Table of Contents
SJCAM SJ8 Pro Review
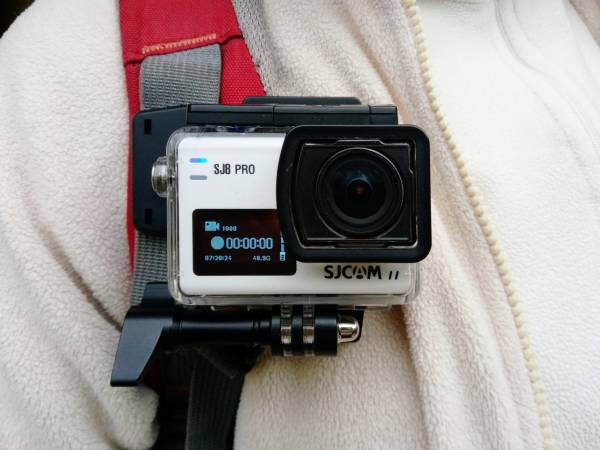
The SJCAM SJ8 Pro action camera was introduced in 2018, it features 4k video at 60 fps and gyroscope image stabilization. I purchaesd it in 2021 to work alongside my old Xiaomi Yi, mainly because I was interested in image stabilization.
Unfortunately SJCAM does not support this camera very much: the latest firmware upgrade is from September 2020, despite there are some evident bugs and several aspects of the user interface which should be improved. Thirdy part support is poor: there is no waterproof case except the original one, which unfortunately has a plastic window. There is not much documentation about customizing the firmware or scripting using the Ambarella Scripting.
See also my other page about this camera:
Specs, Pros and Cons
Pros
- Price: 172 EUR with waterproof case, two batteries and charger, remote control (April 2021).
- Chipset Ambarella H22 S85.
- Sensor Sony IMX377.
- Gyro Stabilizer.
- Capture video at 4K 60 fps.
- Can somewhat customize the firmware.
Cons
- Product is discontinued (as per December 2019). The production of the SJ8 Pro was passed to Vantop, which rebranded the camera as Moment 6S. Buggy firmware is not fixed and support is not responsive.
- Touch screen does not operate with the waterproof case and you cannot fully operate the menu system using the buttons only. You can mount a thinner back (provided) on the waterproof case, but in this case you loose the ability to do deep immersions.
- No acoustic feedback for start and stop recording.
- Shutter button has a different function if the screen is on (start/stop recording) or if the screen is off (turn on the screen). It is impossibile to know if you start recording wihtout looking at the screen; this is a very severe problem if the camera is mounted e.g. on your helmet or if you have strong sun light on the screen.
- Several software bugs exist, even into the latest 1.3.2 firmware.
- Acousting feedback for power-on and power-off is too low.
- Waterproof case with plastic window, not optically perfect, easily scratchable.
- Videos encoded with too few keyframes. The GOP (group of pictures) are set at about one per second, this is a problem if you want to cut clips at sub-second trim points without re encoding.
- Automatic white balance is somewhat erratic, different clips captured in the same light condition at just some seconds of distance get very different white balance, very often colors are too yellowish, at least when using SJCAM Vivid colors.
- SJCAM - Vivid Color Profile produces too much saturated and unnatural colors: sky becomes often banded, the image have too much contrast.
| Specs | |
|---|---|
| Size | 62.5 x 41.0 x 28.8 mm |
| Weight | 85 g |
| Image Processor | Ambarella H22 S85 |
| Image Sensor | Sony IMX377 |
| Lens | 170ᵒ ultra wide angle glass lens |
| Battery | 1200 mA, about one hour recording |
| Storage | Micro SD card up to 128Gb |
| Back screen | Touch 2.33 inch, OLED |
Video Formats
In the following table the information about the videos captured by the SJ8PRO for some of the available video modes.
| 4K (3840 x 2160) 60 FPS - Standard video quality | |
|---|---|
| Format | AVC |
| Profile | Main@L5.2 |
| GOP | M=1, N=64 |
| FPS | 59.940 (60000/1001) |
| Size | 3840 x 2160 pixels |
| Bit rate | 60.0 Mb/s (variable) |
| 4K (3840 x 2160) 30 FPS - Standard video quality | |
| Format | AVC |
| Profile | Main@L5.2 |
| GOP | M=1, N=32 |
| FPS | 29.970 (30000/1001) |
| Size | 3840 x 2160 pixels |
| Bit rate | 40.0 Mb/s (variable) |
| 1080 (1920 x 1080) 60 FPS - Standard video quality | |
| Format | AVC |
| Profile | Main@L4.2 |
| GOP | M=1, N=64 |
| FPS | 59.940 (60000/1001) |
| Size | 1920 x 1080 pixels |
| Bit rate | 30.0 Mb/s (Variable) |
| 1080 (1920 x 1080) 30 FPS - Standard video quality | |
| Format | AVC |
| Profile | Main@L4.2 |
| GOP | M=1, N=32 |
| FPS | 29.970 (30000/1001) |
| Size | 1920 x 1080 pixels |
| Bit rate | 10.1 Mb/s (Variable) |
4K resolution
You may wonder how much is improved the image quality using the 4K resolution; here you are two enlarged details, the first one acquired at full 4K, the second one aquired at 1080. As you can see the 4K gives you actually more details, but more details means that you can enlarge more the image and see more jpeg artifacts. I think you might want to increase the bitrate for the 4K, this can be accomplished customizing the firmware e.g. using the BitrateEditor software.
Sharpness setting
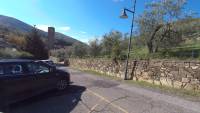
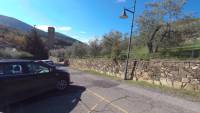
The SJCAM SJ8 Pro has three levels of sharpness selectable from the Current Mode Settings menu: Strong, Standard and Soft. In my opinion the Standard mode is already rather sharp and the Strong setting does not change very much the result; on a cloudy day with low light you may not see any difference. On the contrary, the Soft mode is too much blurred that I suggest to not use it ever, unless you want to get a very particular effect.
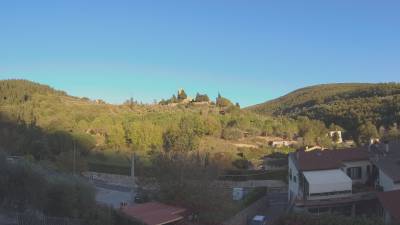
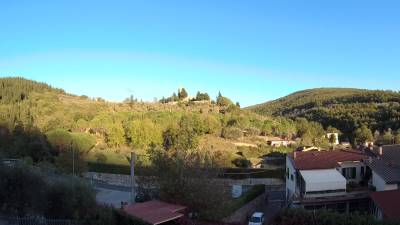
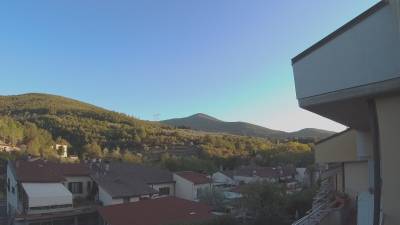
Here you can view the full frames: Strong, Standard and Soft.
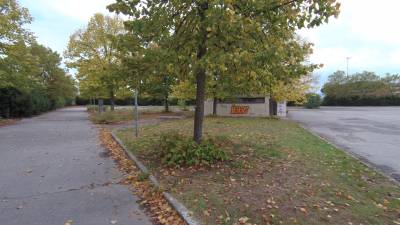
Here you are other three images, from footages taken outdoor on a sunny day; no appreciable differences from Strong to Standard, too much blurred with Soft:
White balance settings
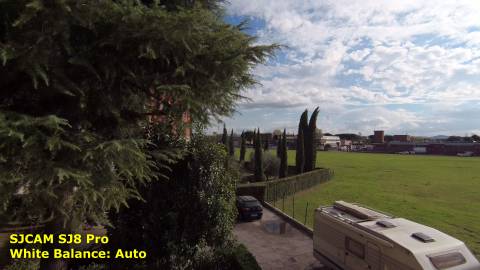
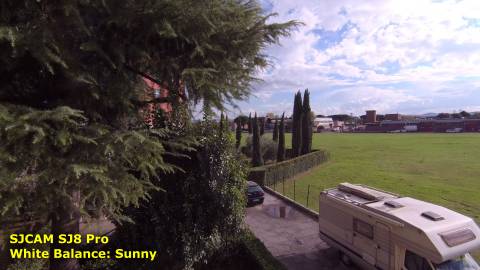
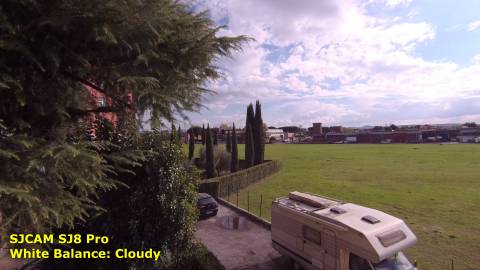
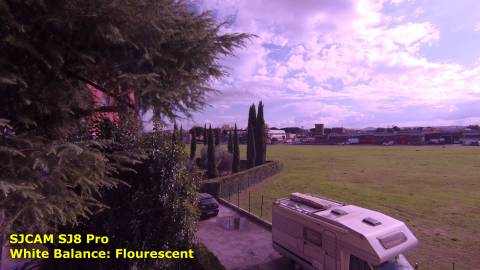
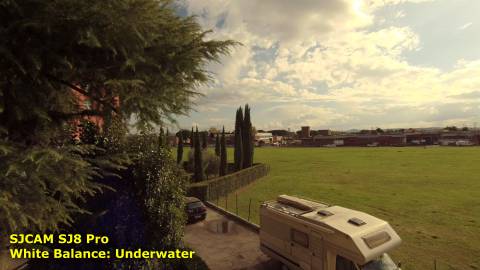
The SJCAM SJ8 Pro camera has 5 settings for the white balance. I mostly set the Auto mode, letting the camera to autodetect the more appropriate white balance, but it seems that sometimes it gets fooled. In particular sometimes, with large portions of blue sky, it seems that the camera chooses the Underwater setting, because I get a strong yellow cast. In other conditions, for example in the woods under the foliage of the trees, the camera seems to select the Cloudy setting because I get a red cast.
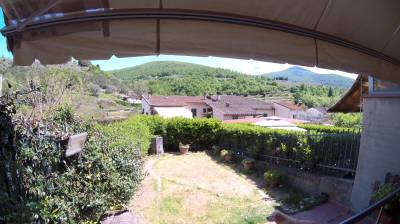
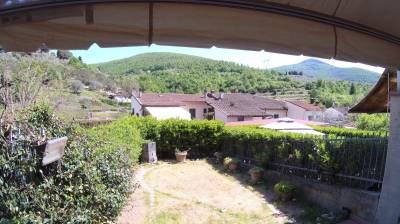
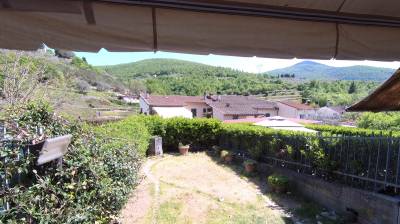
In the following images you can view how the manual setting of the white balance will alter the footage of an outdoor sunny scene:
Color profiles
The SJCAM SJ8 Pro has two color profiles selectable from the Current Mode Settings menu: SJCAM - Vivid and Flat. At bootstrap the camera select another profile, let's call it Default, which is identical to SJCAM -Vivid, but it is stored in a different place into the firmware, so it can be customized separately.
There is a firmware bug that prevent you changing the color profile if the Gyro Stabilizer is enabled, and the color profile choiche is not remebered after power off. In my opinion the vivid profile is too much saturated, specially it enhances too much the contrast from the blue sky and the white clouds, even when the sky is mainly gray and cloudy (as in the frames below). On the contrary the flat profile is too much washed out that you will hardly want to use it.
You can edit the three color profiles SJCAM - Vivid, Flat and Default using BitrateEditor (required version 10.7 - Nov 3, 2021).
Flat vs SJCAM - Vivid
Here are other examples of Flat vs SJCAM - Vivd color profile. As said above, in my opinion, they are both too exagerated. The flat mode lacks contrast, everything appears to be wrapped in a sheen of gray. On the other hand, the vivid profile exagerates the colors too much and contrast is pushed high too much, going too easly to turn black or white and creating colour banding in the sky. The vivid profile also produces yellowish images too often (but this can be a problem with auto white balance).
My old Xiaomi Yi camera have by far more natural colors.
Field of view
The Sjcam 8 Pro has two nice feature: Gyro Stabilizer and Distortion Correction that can be enabled from the settings. The first is used to compensate shaking of the camera, to obtain a more stable footage. The second is used to mitigate the fish-eye effect of the lens, which causes straight lines to become curved, especially at the edge of the frame.
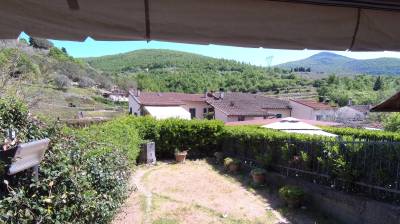
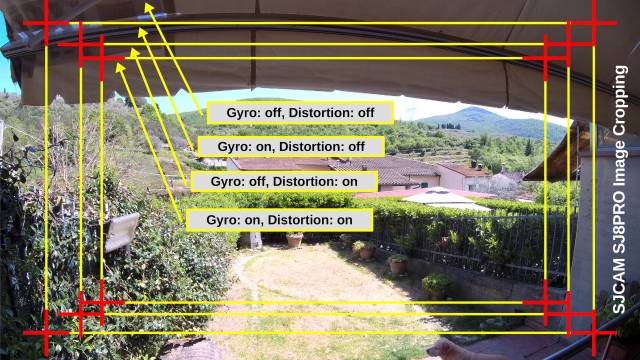
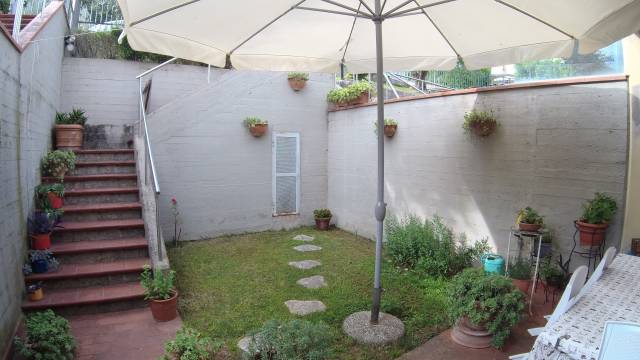
That options require to crop a portion of the image. As you can expect, combining them both, causes larger cropping. The images below are taken with the 4 possible combinations: full frame, gyro stabilizer, distortion correction and finally the combined gyro and distortion:
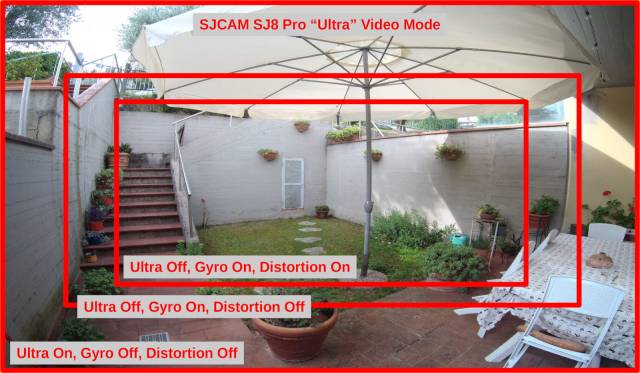
The following image show roughly how much of the full frame is lost for each setting (the frames shoul actually have curved borders!):
The "Ultra" viedeo modes
Touching the Resolution Options when in video mode, you can access the Video Mode Menu. Here the various options are almost self-eplanatory: you can choose the video resolution (e.g. 3840×2160, 2720×1520, 2560×1440, 1920×1080, etc.) and the framerate (24, 25, 30, 50, 60 or 120 frames per second). But some video modes have the ultra attribute which is not explained into the manual nor into the FAQ.
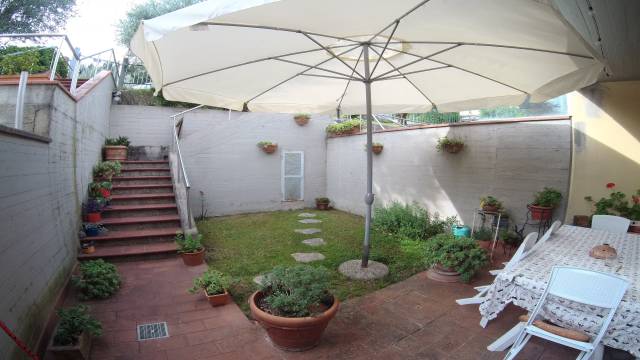
The ultra video modes just mean that all the surface of the sensor is used to capture the video, i.e. you get a wider field of view. A wider viewing angle means more distortions at the edges of the frame.
There are two other settings that affect the field of view: Gyro Stabilizer and Distortion Correction, so may wonder how that options combines up together. As a rule of thumb you can think that the options Gyro Stabilizer and Distortion Correction will reduce the field of view, whereas the Ultra option will enlarge it:
Here some personal notes about the 8 possibile combinations:
| Ultra Mode | Gyro Stabilizer | Distortion Correction | Note |
|---|---|---|---|
| On | Off | Off | Maximum field of view and maximum image distortion. |
| Off | On | On | Minimum field of view and minimum distortion. |
| On | On | Off | Best compromise for hand-held camera, wide angle. |
| Off | On | Off | Best compromise for hand-held camera, narrow angle. |
| On | Off | On | Too much stretched horizontally. |
Maximum field of view (Ultra On, Gyro Off, Distortion Off):
Minimum field of view (Ultra Off, Gyro On, Distortion On):
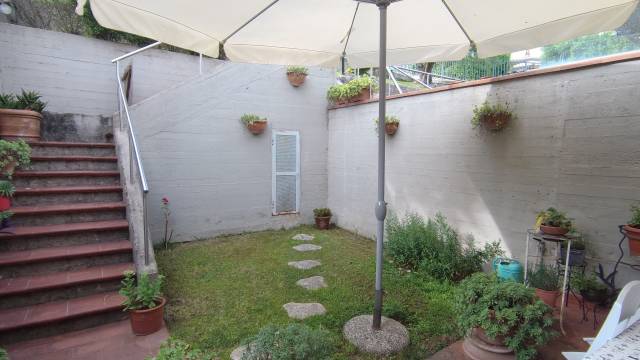
Best setting for hand held camera (Ultra Off, Gyro On, Distortion Off):
Ultra vs Normal Video Mode
SJCAM Zone Android App
I installed the SJCAM Zone app version 5.9.4 for Android (July 2021), the app archive is about 90 Mb in size and it occupy about 192 Mb once installed. Like other similar apps, it required me to turn off internet data on my smartphone, otherwise the WiFi pairing with the cam fails.
On the SJ8 Pro I have firmware 1.3.2, the app have some severe problems: the more severe is that I cannot browse the videos stored on the camera because the camera reboots itself whenever I tap the gallery icon on the app. Sometimes the app does not start the image preview.
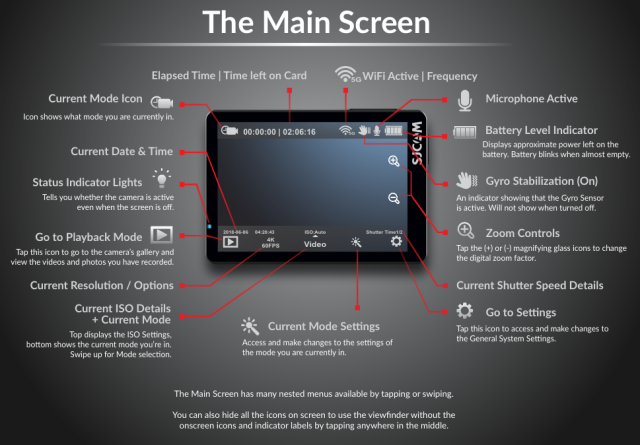
Main Menu Screen
The remote control
I think that SJCAM missed a great opportunity to make this camera a perfect choice by designing a remote control which is almost useless. The remote control can be mounted on a wrist strap or used like a nice button tag, the five buttons are:
- WiFi
- Power OFF
- Video start/stop
- Single photo shutter
- Photo burst shutter
The two deadly sins committed by designers are:
- No feedback if you actually pressed for START recording or STOP recording! If you don't have the camera screen in sight (e.g. you have mounted it on the helmet or pointing backward on your bike) you will never know if you are filming or not! Unfortunately the camera does not have any sound feedback either.
- If you accidentally press the Power OFF button you cannot turn ON the camera again. A big problem if you mounted the camera in a position where you cannot reach it with your finger!
Using the camera without the touchscreen
When the camera is into the waterproof case you can operate it only with the buttons, the touch screen does not work. My camera was shipped with a spare case back, which is thin enough to let operate the touchscreen; mind that mounting that back cover you loose the 30 meters waterproof feature, the case becomes only splash resistant.
| Poweoff | |
|---|---|
| Power button (3 seconds) | Power On |
| Video Mode Menu, with screen on | |
| Power button (short) | Mode Select Menu |
| Power button (2 seconds) | Power Off |
| Shutter button | Start recording |
| Video Mode Menu, with screen off | |
| Power button | Screen On |
| Shutter button | Screen On |
| Options Menu | |
| Power button | Next option |
| Shutter button | Select/Confirm |
| Power button (2 seconds) | Power Off |
As far I know, there is no way to get the go back function to fully navigate the menu system.
Firmware Bugs
Despite the installation of the latest 1.3.2 firmware (dated 2020-06-08), several problems are unresolved.
- In video mode, touching the Current Mode Settings icon (magic wand), you can set the Color Profile choosing between SJCAM - Vivid and Flat. The first problem is that you cannot change the color profile if Gyro Stabilizer option is On (the color profile option is grayed-out); you need to temporary disable the gyro option before changing the color profile. The second problem is if you select the Flat setting, on the screen you will still read SJCAM - Vivid, despite the video will be recorded with the different color profile.
- The Color Profile setting is not retained once powered off. At bootstrap the camera uses a default color profile which is much like the SJCAM - Vivid, but it is not. Infact, if you customize the SJCAM - Vivid profile, that customization is not activated at bootstrap, you have to manually select SJCAM - Vivid to obtain the effect.
- The Current Resolution / Options menu cannot be operated with the buttons.
- It seems that the API implementation is rather buggy: I experienced reboots of the camera when interacting with the API. Also the official app (which actually uses the same API) causes the camera to reboot when I tap the gallery icon.
Upgrading the Firmware
The built-in help can be accessed from General System Settings (gear icon) ⇒ Q/A icon (bottom-right corner of the screen).
- Option A: Update via SJCAM Zone Mobile App: Please refer to App's FAQ.
- Option B: Go to SJ8 firmware section on the SJCAM official website and follow the instructions there.
- Option C: In case Your camera crashes, freezes, or You encounter any other constant problems, we strongly recommend to do the USB upgrade. You may find the USB flashing software and installation instruction on SJCAM official website.
Official Website address: https://sjcam.com
I tried the Option B:
- Downloaded the SJ8PRO_V1.3.2_20200608.rar file from the official web site.
- Extracted the two files: SJ8_CHECK.ch and SJ8_FWUPDATE.bin from the archive.
- Copied the two files into the root directory of the SD card.
- Inserted the card into the camera and powered it on. The flashing procedure starts automatically, on the display appears the message Firmare found. The camera automatically reboots after the flasing and the firmare files were removed.
- Check the firmare installed by choosing from the main menu Settings ⇒ Version,
Custom Firmwares
There are many hackers who produce modified versions of the original firmware. In general they distribute the original firmware patched in several places, mainly to customize framerates, exposure parameters, etc.
I created a custom firmware to improve some video codec settings and to improve image quality (mainly color balance and saturation). You can find it here: SJCAM SJ8 Pro Custom Firmware.
Generally there is no access to the source code, so patching the firmware binary is a rather delicate task, requiring to know the exact offset of the data into that specific version of the firmware, the structure and the lenght of the data and eventually how to update the embedded checksums. SJCAM does not facilitate the task, because it distribute different versions of the firmares marked with the same version number.
The best approach is to use the BitrateEditor, a graphical Java program which facilitates the task of editing various parameters in form of easy readable tables. The program contains several configuration files, so it can check that you are actually editing the proper version of the firmware (it can do check of particular strings at particular offset, calculate regions checksums, etc.). The program has the capability to re-pack the firmware image after the edits, updating the checksums so that the file will be flashable into the camera.
You can refer to the page How to customize the Ambarella firmware of the SJCAM SJ8 Pro with my notes about customizing the SJ8 Pro firmware using BitrateEditor. You can also refer to the program I wrote which can extract files and partitions from the firmware files: ambarella-h22-firmware-tools.
SD Card partitioning and formatting with GNU/Linux
The SJ8 Pro cannot create the required partition onto the SD card: you have to provide an already partitioned one. The recommended filesystem for the partition should be exFAT, which is optimized for SD cards and it can host files with size grather than 4 Gb. For cards with size of 32 Gb or more, the exFAT should be the default filesystem provided by the manufacturer.
The Linux kernel introduced native exFAT support with the 5.4 release, in Debian you have to install the exfat-utils and exfat-fuse packages. To prepare an SD card from scratch using GNU/Linux, it is advisable to zeroes the first 64 Mb of the card, to remove any existing partitioning information on it:
dd if=/dev/zero of=/dev/sdb bs=1M count=64
the parted program is used to create the partition:
parted /dev/sdb
We create a legacy MSDOS partition table and a single partition starting from sector 32768 (thus leaving a free space of 16 Mb at the begin of the card):
mklabel msdos
unit s
mkpart primary ntfs 32768 100%
quit
Using mkfs.exfat we create the partition filesystem, assigning a label to it:
mkfs.exfat -n "action_cam" /dev/sdb1
In addition to parted, we can use also fdisk -l /dev/sdb to view the existing partition:
Device     Boot Start       End   Sectors  Size Id Type
/dev/sdb1       32768 123596799 123564032 58,9G  7 HPFS/NTFS/exFAT
Using fsck.exfat we can verify the the filesystem is without errors:
fsck.exfat /dev/sdb1
When the SD card is into the camera, it is possible to format it creating a new filesystem into the partition; just select the menu Settings ⇒ Format. Beware that this operation will erase all the files on the SD card, including eventyally the autoexec.ash file. Also the volume label will be erased.
In some case you may prefer to use the legacy FAT filesystem (e.g. if you have an old PC, which si unable to read exFAT), you can use the following command to prepare the filesystem on GNU/Linux:
mkfs.vfat -F 32 -s 64 -R 1024 /dev/sdb1
See this page Manipulate storage devices with D-Bus udisks2 if you want to mount the SD card in GNU/Linux without the exec bit set.
Dual operating system: GNU/Linux and RTOS
The SJ8 Pro camera runs two operating systems: a small version of GNU/Linux and a RTOS (Real Time Operating System) based on ThreadX.
GNU/Linux is responsible for operations like WiFi connection, API interface over the TCP protocol for remote control (using the SJCAM Zone app), etc. It is possibile to have access using the telnet protocol, once the camera is connected via WiFi. The Linux environment is equipped with busybox, a powerful command line tool.
RTOS is responsible for actual camera operations (video recording, etc.). As far I know there is not possibility to access that operating system interactively, but you can execute a script at camera bootstrap, called autoexec.ash. The RTOS is equipped by some commands knwon as Ambarella Scripting, which can be used into the autoexec.ash script. Is is also possibile some limited interacion between GNU/Linux and RTOS, see below for details.
Activate WiFi from RTOS autoexec.ash
This script will activate the WiFi as a station, joining your LAN access point:
sleep 5000
t app wifi mode sta
t app wifi sta_essid MyHomeAP
t app wifi sta_password Password
t app wifi restart
The sleep command (5000 milliseconds) causes the subsequent actions to be executed about 15 seconds after power on. On your DHCP server you will see the DHCPREQUEST from a MAC address with the d4:12:43 prefix (AMPAK Technology, Inc.).
The WiFi is enabled despite the WiFi icon does not appear on the camera screen.
Telnet into GNU/Linux as root
Once the camera gets its IP address, you can telnet it as root, no password required:
telnet 10.0.1.226
AmbaLink login: root
~#
If the camera have a power-off timer, it will be turned off even if you have accessed it via telnet. Here are the mounted partitions:
~# df
Filesystem           1K-blocks      Used Available Use% Mounted on
/dev/root                10496     10496         0 100% /
devtmpfs                 25996         0     25996   0% /dev
tmpfs                    34348         0     34348   0% /dev/shm
tmpfs                    34348        16     34332   0% /tmp
tmpfs                    34348        12     34336   0% /run
c:                    31248384    102688  31145696   0% /tmp/SD0
tmpfs                    34348        16     34332   0% /pref
Here are the memory usage:
~# cat /proc/meminfo
MemTotal:          68696 kB
MemFree:           31016 kB
MemAvailable:      45712 kB
Buffers:            5068 kB
Cached:            10284 kB
SwapCached:            0 kB
Active:            15416 kB
...
The CPU information:
~# cat /proc/cpuinfo
processor       : 0
BogoMIPS        : 102.00
Features        : fp asimd evtstrm aes pmull sha1 sha2 crc32
CPU implementer : 0x41
CPU architecture: 8
CPU variant     : 0x0
CPU part        : 0xd03
CPU revision    : 4

processor       : 2
BogoMIPS        : 102.00
Features        : fp asimd evtstrm aes pmull sha1 sha2 crc32
CPU implementer : 0x41
CPU architecture: 8
CPU variant     : 0x0
CPU part        : 0xd03
CPU revision    : 4

processor       : 3
BogoMIPS        : 102.00
Features        : fp asimd evtstrm aes pmull sha1 sha2 crc32
CPU implementer : 0x41
CPU architecture: 8
CPU variant     : 0x0
CPU part        : 0xd03
CPU revision    : 4
SendToRTOS and RecvFromRTOS
There are two specific commands to interact with the RTOS, the other operating system running on the camera. The two commands are rather limited:
usage: SendToRTOS <event type> [further info]
<event type>:
   "boot_done": Linux boot done.
   "net_ready" <type>: network ready as specified type.
       <type>:
           0: AP mode.
           1: STA mode.
           2: P2P mode.
   "net_off": network turned-off.
   "photo": Capture photo with bluetooth shutter.
   "record": Record with bluetooth shutter.
usage: RecvFromRTOS [-f]
    Paramters:
        "-f": same as "en_fg", to run at fore-ground.
Ambarella Scripting in RTOS
As said above, the RTOS Real Time Operating System is not accessbile using an interactive shell. You have instead to create a file named autoexec.ash into the root directory of the SD card: this file can contain Ambarella Scripting and it will be executed at bootstrap.
WARNING: the autoexec.ash file must have Unix newlines, including on the last line, otherwise it will not be executed.
The Ambarella "t" commands
The most versatile command in Ambarella Scripting is the t command, you can browse the strings contained in /dev/mtdblock1 partition to have some ideas of the existing commands and syntax.
The RTOS can execute a program under the GNU/Linux operating system via the t ipc command:
t ipc rpc clnt exec2 '<command> <arg1> ...'
E.g. you can start the recording by sending back (from Linux to RTOS) the record command:
t ipc rpc clnt exec2 '/usr/bin/SendToRTOS record'
Or you can execute a script saved into the SD card:
t ipc rpc clnt exec2 '/tmp/SD0/myscript.sh'
Configure WiFi as Access Point: ESSID, password, channel:
sleep 5000
t app wifi mode ap
t app wifi ap_ssid MyActionCamAP
t app wifi ap_passwd PassWord
t app wifi ap_c 0
t app wifi restart
Disable recording of LRV (Low Resolution Video) files:
t app test record duals 0
WiFi management:
t app wifi start
t app wifi stop
t app wifi restart
Stop execution for some milliseconds:
sleep 5000
This command simulates pressing a button:
t app key <key>
where <key> can be one of this:
    up            One step up in main settings or page up in options.
    up_rel
    down          One step down in main settings or page down in options.
    down_rel
    left          One step up in options.
    left_rel
    right         One step down in options.
    right_rel
    zoomin
    zoomin_rel
    zoomout
    zoomout_rel
    set           OK/Confirm. Start recording in video mode.
    focus
    focus_rel
    shutter       Take photo in still mode, go back from settings.
    shutter_rel
    record        Start/stop video recording.
    mode          Switch between recording and playback modes.
    menu          Go to settings from any mode, "press" again to go back to shooting mode.
                  NOTICE: Does not work: causes a reboot instead.
    power         Turn the camera off.
    del
t app test bb <option>
    Test option list:
        user
        file <filename>
        file2 <filename> <SrcChannelMode> <SrcSampleRate> <DstSampleRate>
t app test np <option>
    Test option list:
        open <num>
        play
        stop
        pause
        resume
        next
t app wifi  <option>
    option list:
        start
        stop
        restart
        status
        mode sta/ap
        ap_ssid [ssid]
        ap_passwd [passwd]
        sta_essid [essid]
        sta_password [password]
        dump
t app edit <option>
    option list:
        init
        complete
        clip starttime endtime filenameout
t app test graph <option>
    save_osd [chanId]
    rotation [chanId] [degree]
    convclut
t app msg <msg> <param1> <param2>
t app jack <jack> <event>
    Jack list:
        hdmi
        cs
    Event list:
        in
        out
t app test chg_res [resolution ID]
t app test chg_bitrate c [BitRateAvg]
t app test chg_bitrate v [BitRateAvg][BitRateRatioMin][BitRateRatioMax]
t app test <option>
    Test option list:
        chg_res
        chg_bitrate
        chg_LCD
        chg_mode
        chg_app
        chg_usbmode
        graph
        freq
        extenc [on | off | set_freq | sw]
        texttrack [on | off | sw]
        wakeup [alarm time(sec)]
        bb
        enc
        wdt
        vf [on | off | sw]
        rtsp [on | off | show]
        rec [av | v | show]
        ps
        idr
        np
        usbdbg [start | 2uart | 2usb]
        record
        fdmo [0 | 1]

t app test playbeep <index> <times>
The TCP API
See the page SJCAM SJ8 Pro WiFi Ambarella API about the programming interface (API) offered by the SJCAM SJ8 Pro over the WiFi connection or even in localhost. The interface is offered on port TCP/7878.
The interface is based on JSON messages: you can exchange them over the WiFi connection as the official app SJCAM Zone does between the Android device and the camera. You can also connect a PC to the camera via WiFi and use any programming language supporting TCP sockets.
You can also send messages from the camera itself: the RTOS operating system provides the telnet command which can ben used to talk to the GNU/Linux operating system running on the same camera, which handles the API requests (the camera actually runs two operating system simultaneusly: RTOS and Linux). In this scenario I was able to talk to the API but with no interaction: I used telnet to only send messages but I did not find any way to read the answers.
Connecting to GNU/Linux via USB
If you connect the SJ8 Pro camera to a GNU/Linux computer using an USB cable, the Linux kernel will detect it, this is the lsusb output:
Bus 001 Device 006: ID 070a:4026 Oki Electric Industry Co., Ltd A9 Platform
The kernel inform also that the device is available as USB Mass Storage:
usb 1-1.1: new high-speed USB device number 6 using ehci-pci
usb 1-1.1: New USB device found, idVendor=070a, idProduct=4026, bcdDevice= 0.01
usb 1-1.1: New USB device strings: Mfr=1, Product=2, SerialNumber=3
usb 1-1.1: Product: A9 Platform
usb 1-1.1: Manufacturer: AmbarellaInc
usb 1-1.1: SerialNumber: 0001
usb-storage 1-1.1:1.0: USB Mass Storage device detected
scsi host6: usb-storage 1-1.1:1.0
scsi 6:0:0:0: Direct-Access     SJCAM    SJ8PRO           1000 PQ: 0 ANSI: 0
sd 6:0:0:0: Attached scsi generic sg3 type 0
Tips
- Hard reset: 13 seconds press on power button. Will reset time and date.
To be confirmed.
Web References
- Frimware
- DashcamTalk - AFT 1.3.2 Ambarella firmware editor - Comments about AFT 1.3.2.
- Software for firmware editing
- BitrateEditor - Software (Java) to edit parameters directly inside the firmware binary file (bitrate, GOP, gamma and YUV values, and many others!).
- Ambarella Firmware Toolbox 1.3.3 - Software (Java) to edit Ambarella A2, A5 and A7 firmware binaries: extract partitions from binary file, build (re-pack) firmware, string editor, bitrate editor, AE table editor.
- AFT - An Ambarella cross platform firmware editor - What seems to be the Home Page of AFT.
- amba_fwpak.py - Ambarella Firmware Packer tool.
- Ambarella Scripting

