Table of Contents
Convert a Smartphone's Portrait Video into Landscape, with ffmpeg
We have a problem: nowday too much people have a smartphone which is capable to take videos of very good quality. But very few of them realize that we have (generally) two eyes: one on the right and the other on the left; they think that we have one eye above and the other to the bottom, so they keep to take videos with the smartphone in the portrait orientation.
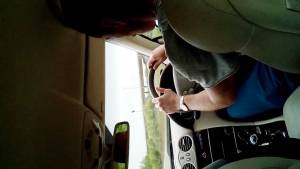
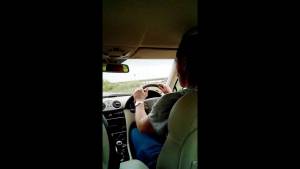
This is not a really problem, if we keep that videos in the phone and we watch at them in that miniature screen (until the phone is lost/broken/stolen). But it is really unacceptable if we want to watch at them using a normal, modern screen, which has inevitably a 16:9 aspect ratio. We will face at two equally unacceptable situations: the video player does not apply the rotation metatag contained into the video, or the video player adds two lateral black bands:
The Compromise Solution
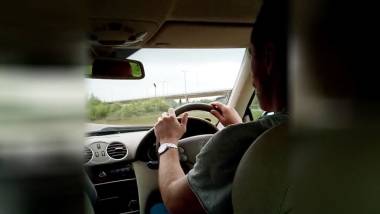
A compromise solution is to cut out a central area of the video and add to the sides some artifact that simulates the presence of a portion of video that does not actually exist. I find that solution by far more acceptable than the original video:
So we have to:
- Choose a region to crop from the original video. It can vary from a square to the full portrait rectangle.
- Make a fake background blurring the cropped region and stretching it to the 16:9 aspect ratio.
- Overlay the cropped region over the fake background.
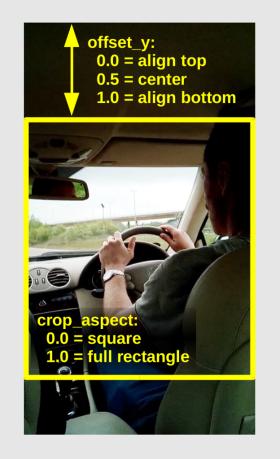
We wrote a Python script to assist in step #1, which calculate all the required numbers just provinding two parameters: the crop_aspect and the offset_y.
Adjust the crop_aspect from 0.0 (which selects a square) to 1.0 (which selects the full rectangle of the picture). Using a square-shaped crop area we will get the highest zoom level into the video, but we will cut-out a greather part of the frames, above and below the cropped region.
We can move the cropped region to the top of the image by setting offset_y to 0.0. Move it to te bottom by setting it to 1.0. To crop the image at the center of the screen, use an offset_y of 0.5. If you use a crop_aspect equal to 1.0 (full frame rectangle), the offset_y will be ignored.
Cropped Region and Fake Background
Once selected the cropped region, a fake background is created by simply stretching the region to 16:9 aspect ratio and applying a blur effect.
The Gradient Overlay Mask
When the cropped image is placed above the background, it is quite annoying to see the sharp edge of the image. A better approach is to gradually fade the image at the right and at left edges. This requires to blend the image and the background using a gradient mask. We prepared the mask as a PNG image, using convert from the ImageMagick suite.
convert -size 768x768 \
    -define "gradient:bounding-box=768x38+0+0" -define "gradient:vector=0,37,0,0" \
    gradient:none-black \
    -define "gradient:bounding-box=768x768+0+730" -define "gradient:vector=0,730,0,767"
    gradient:none-black \
    -composite -channel a -negate -rotate 90 tmp_mask.png
NOTICE: It seems that there is a bug in ImageMagick gradient:bounding-box, so we had to generate the mask in top-down mode and rotate it 90 degrees afterward.
The ffmpeg Recipe
The first step is to remove the rotation metatag from the input video. It seems that ffmpeg is unable to remove the metatag and apply the required video filters in the same pass, so we need to make a temporary copy of the input video file, without re-encoding it:
ffmpeg -i input_video.mp4 -c copy -metadata:s:v:0 rotate=0 tmp_norotate.mp4
finally we invoke ffmpeg to do all the magic. We use a filter_complex incantation:
ffmpeg -i tmp_norotate.mp4 -loop 1 -i tmp_mask.png -filter_complex "\
  [0:v]split [a][b]; \
  [a]transpose=1,crop=720:720:0:280,scale=768:768,setdar=768/768 [crop]; \
  [b]transpose=1,crop=720:720:0:280,scale=1366:768,setdar=16/9,avgblur=54 [back]; \
  [1:v]alphaextract [mask]; \
  [crop][mask]alphamerge [masked]; \
  [back][masked]overlay=299:0 \
" video_out.mp4
The first video stream [0:v] coming from the video file is splitted in two. The first copy, called [a], is used to crop the interesting part after the rotation (transpose), thus creating the [crop] stream. The second copy, called [b], is used to create the background applying rotation, stretch and blur filters, thus creating the [back] stream. The mask image is used in loop to create another video stream [1:v], from which we extract the alpha channel (transparency) creating a stream called [mask]. The [crop] stream is merged with the [mask], providing the [masked] stream. Finally the [masked] stream is overlayed to the [back] one, to realize the final output.
The Python Script
The Python script smartphonevideo_2landscape will make the calculation to prepare the whole incantation: it will print on the standard output a shell script with the proper invokation of convert and ffmpeg. Use it in this way:
smartphonevideo_2landscape video_file [crop_aspect] [offset_y] > ffmpeg_recipe
source ffmpeg_recipe
You have to edit the script to adjust the size of the input video (default 1280×720), the rotation needed (default 1 = 90 deg clockwise), and the size of output video produced (default 1366×768).


