Table of Contents
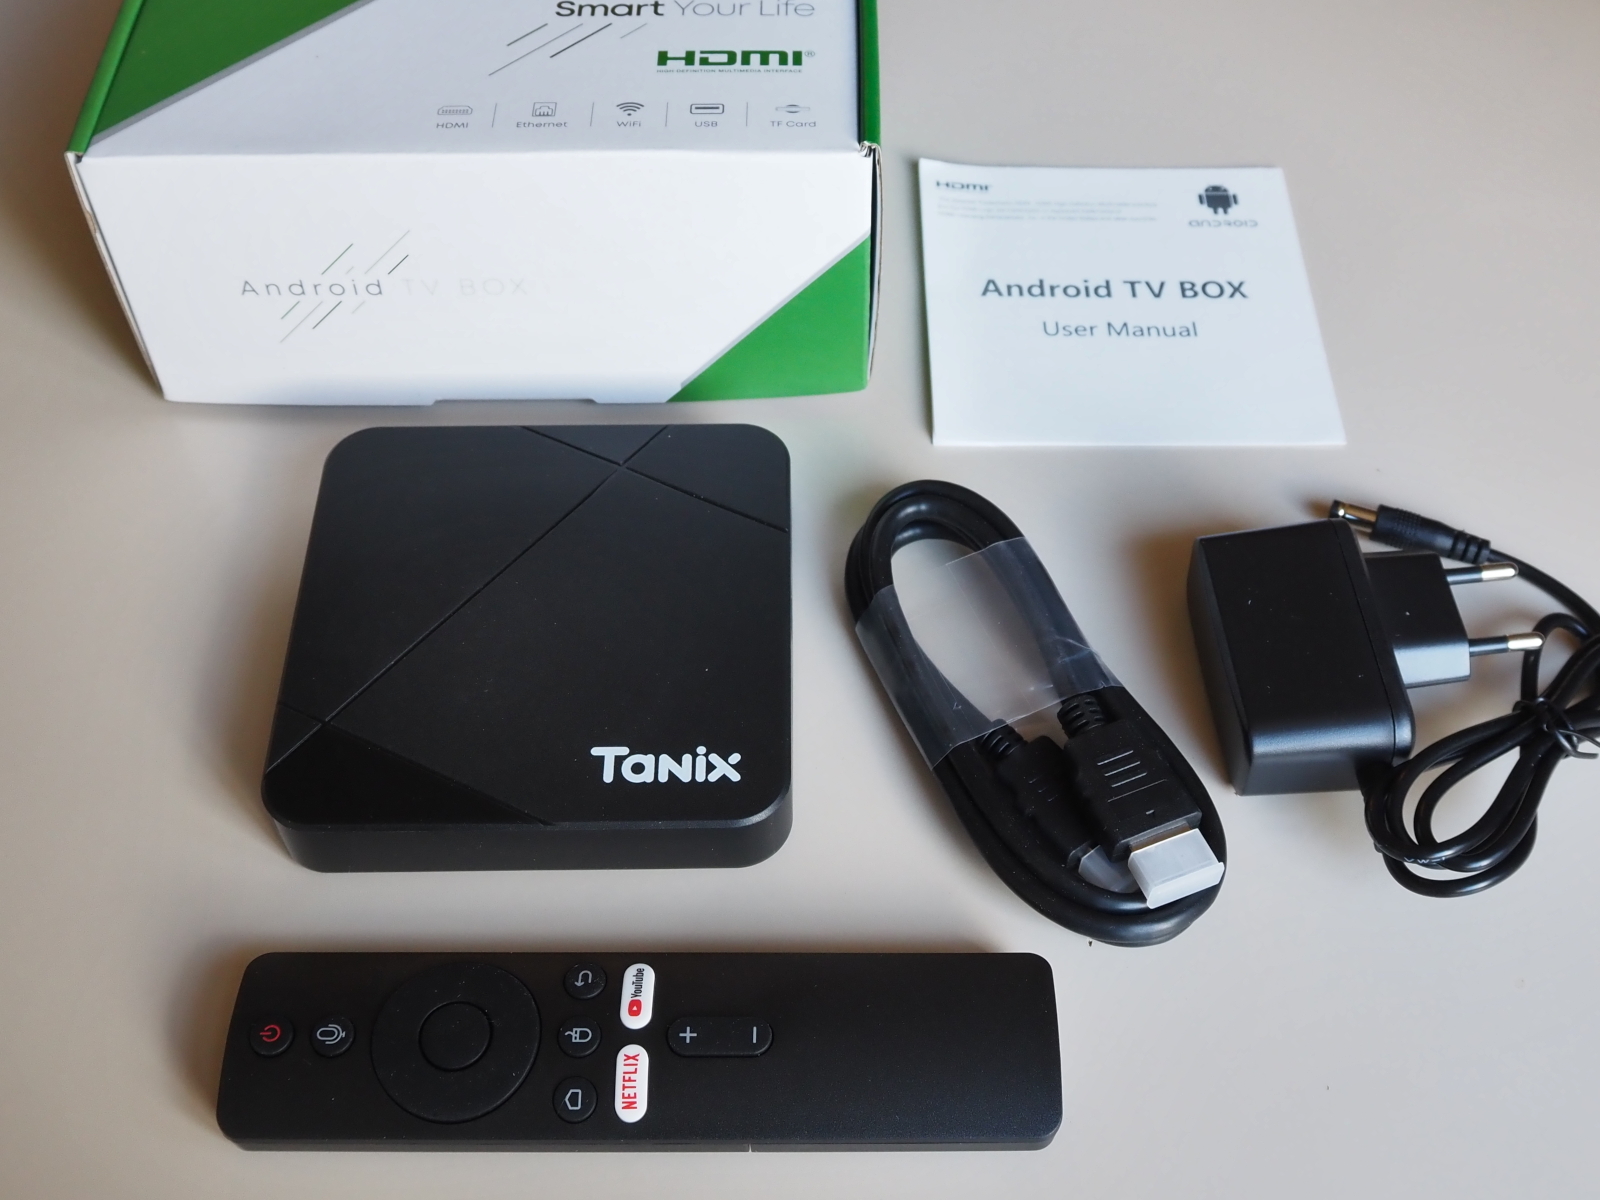
Tanix TX5 Android TV Box
In the past I purchased some Android TV boxes like the MXQ (based on the Amlogic S805) or the X96 Mini (based on the Amlogic S905W). I liked the ability to have low-cost hardware to run CoreELEC or LibreELEC on, primarily for playing multimedia videos from local storage and occasionally streaming videos from some free sources.
As you can imagine these devices in my possession were dedicated to running the Kodi media player all the time, so I wasn't interested in the plethora of Android features that the devices came with with the stock firmware. This is why I have always used these Amlogic devices by flashing (or installing onto an SD card) the CoreELEC or LibreELEC firmware, ignoring the factory one. This had the added benefit that performance was perfectly adequate despite the low-end hardware.
In December 2025, I was contacted by email by an employee of Oranth Technology who proposed a collaboration: they would provide me with a sample of their Tanix TX5 Android TV Box and I would write a review on my website. I usually write scattered notes on items I personally purchase, but this time I'll have to do a thorough and accurate job of recognizing the gift I was given.
| | Good performance. The Amlogic S905Y5 proved to be adequate to play 4K 60 fps contents directly from streaming or local files (e.g YouTube or Kodi). Root permission per default, can also enable developer options. Bluetooth remote control as well as infrared. Fair price range (35-70€). Can install alternative firmware? E.g. slimBOXtv  |
| | Google TV app as home app, very invasive and annoying. Android version not certified by Google. 32bit OS despite 64bit CPU. Pre-installed sofware which calls regularly home for unknown reasons. |
I will try to explore both the features offered by the factory-installed software (Android Google TV), and the possibility of getting rid of the proprietary Google software and installing a free, open source operating system to run Kodi.
Specs
I applied a factory reset from the Recovery menu:
| SoC | Amlogic S905Y5 |
|---|---|
| CPU | Quad Core ARM Cortex-A55 CPU (ARMv8) |
| GPU | Mali G31TM MP2 |
| RAM memory | 3.6 Gb |
| NAND Storage | 32 Gb |
| Android TV OS | 14.0.0 API level 34 |
| O.S. Architecture | 32 bit armeabi-v7a |
| Build number | qurra-userdebug 14 UD2A.240505.001.w1 eng.fjq.20251111.100710 test-keys |
| Security patch level | June 5, 2025 |
| Linux kernel | 5.15.170 |
| Power supply | Coaxial plug 2.1×5.5 mm - 5 volt, 2 ampere |
From the terminal you can confirm that the Android TV OS is 32bit, despite the CPU is 64bit capable:
# getprop ro.product.cpu.abi
armeabi-v7a
# getprop ro.product.cpu.abilist
armeabi-v7a,armeabi
# cat /proc/cpuinfo
...
model name      : ARMv8 Processor rev 0 (v8l)
Ports and connectors


The clock
The Tanix TX5 has a four digits clock on the fron panel, when the device goes to stan-by the clock is turned off. There is not an hardware clock backed with a battery, so the time is displayed correctly only if the internet connection is available.

Ethernet Network DHCP client
Once connected to an Ethernet network, the device attempts a DHCP configuration using the following MAC address prefix:
| MAC Prefix | Vendor |
|---|---|
| 02:22:50 | No assignment |
The device attempts bot an IPv4 configuration and a ICMP6 neighbor solicitation.
Google TV app
The default home screen is the Google TV app. The app is very annoying because it wants to force you to login into a Google account whenever you select the Set up Google TV option. If you choose the Cancel option a bastard and surreptitious message appears: Unplug the ethernet cable to continue. So if you want to use the box as a media player of your locally stored media, you are forced to have an home app which continously ask you to login in its very privacy-unfriendly cloud.
Fortunately enough if you long press the Home button on the remote, you can access an app list, where you can find Kodi, a couple of file browsers and the subscreen with all the other installed apps.
YouTube app
 Once launched, also the official YouTube app try to forces you to log-in into one account to access contents. The procedure using only the remote control did not work, I had to use the QR code shown on the screen and a separate device (my smartphone) to connect the account.
Installing app from F-Droid: the Termux terminal
I tried to use the TV box witout adding a Google account, because I want the device to be free as much as possibile. Being without an account, I cannot install apps from the Google Play. The F-Droid repository is my preferred alternative.
The first goal is to have a terminal application and Termux is actually the best choice.
- Attach an USB keboard for easy typing.
- Pressing the mouse button on the IR remote control the mouse pointer appears on the scree, you can move it with the directions pad.
- Run the Chrome browser and visit the F-Droid repository.
- Download the F-Droid app an run it (the File manager can install foreign apps).
- Update the repository list into the F-Droid app, search and install the Termux app.
See the paragraph Problems installing from F-Droid if you have problems using the F-Droid app.
Root access
The unit I was provided with, has root access enabled. Into the Termux window I execued the su command and it succeeded!
Remote control
The remote control is both infrared and Bluetooth. When using the infrared you must aim the remote to the device in a srraight line of view, using Bluetooth instead allow you a more free handling.
To use the Bluetooth is necessary to pair the remote with Android OS. If the procedure did not started during the first install, you can go to Android Settings ⇒ Remotes & Accessories ⇒ Pair remote or accessory and follow the on-screen instructions.

Remote control microphone
Paring the Bluetooth add the bonus that you can use the remote as a microphone, for the Google Assistant or other voice-enabled inputs. The first time that you press the microphone button on the remote, the Android operating system invites you to pair the microphone, if not already.

Enabling the Android developer options
It is possibile to enable the developer options in the Tanix Android TV OS: go to Settings ⇒ System ⇒ About and tap seven times over the Android TV OS build. Then you will find the new item into Settings ⇒ System ⇒ Developer options.
Among the other options, there are:
- OEM unlocking ⇒ Bootloader is already unlocked
- USB debugging ⇒ Can be enabled
- Wireless debugging ⇒ Disabled, cannot enable it
Android adb over USB
The device does not announce itself as an Android device on the USB ports. Running the adb tools on the attached GNU/Linux PC does not show any:
adb  devices
List of devices attached
Android adb over Ethernet
On the Android device
su
setprop service.adb.tcp.port 5555
stop adbd
start adbd
On the PC:
adb connect 192.168.33.47:5555
adb shell
You will get the root prompt:
qurra:/ #
The service setting on the Android device does not survive a reboot, nor the connection on the PC.
Problems with the adb shell over Ethernet
Using the adb shell over Ethernet I experienced several problems, it appears that the process is killed both when using simple interactive commands and when copying files.
root@firewall:~# adb push test-movie.mkv /sdcard/Movies
[  4%] test-movie.mkv
adb: error: failed to read copy response
test-movie.mkv: 1 file pushed, 0 skipped. 12.6 MB/s (523164782 bytes in 39.621s)
adb: error: failed to read copy response
Closing all the apps on the Tanix device seems that makes the adb a bit more reliable, but it is really unstable and unreliable.
Security and privacy
The device comes with an Android version which is not certified by Google. Look from the app Google Play ⇒ Settings ⇒ About ⇒ Play Protect certification; you can read Device is not certified. It's obvious that it can't be: the device is rooted and has an unlocked bootloader.
The main consequence of the lack of Play Protect certification is that Google apps on the device aren't licensed and aren't real Google apps, they are side-loaded. This means e.g. that they can't go through the standard process of app upgrade.
By default all the installed apps are granted with very powerful and harmful permissions, e.g. Install unknown apps, Allow access to manage all files, Allow display over other apps and Can modify system settings. See:
- Settings ⇒ Privacy ⇒ Security & Restrictions ⇒ Unknown sources ⇒ Install unknown apps
- Settings ⇒ Privacy ⇒ Special app access ⇒ All file access ⇒ Allow access to manage all files
- Settings ⇒ Privacy ⇒ Special app access ⇒ Display over other apps ⇒ Allow display over other apps
- Settings ⇒ Privacy ⇒ Special app access ⇒ Modify system settings ⇒ Can modify system settings
With all that power to apps, I feel more uncomfortable due the automatic updates enabled for the system and the apps. It seems that the former cannot be changed, only the later:
- Settings ⇒ System ⇒ About ⇒ System update (cannot turn off automatic updates)
- Google Play ⇒ Settings ⇒ Auto-update apps ⇒ change to Don't auto-update apps
It is not clear if some privacy-unfriendly options are enabled. E.g. the Automated Content Recognition (ACR) is enabled or not. To be on the safe side check this setting:
- Settings ⇒ Privacy ⇒ Usage & diagnostics: turn it off
Default Tanix account
At first boot the device had an account configured on the Tanix network, which disappeared after a Recovery Facoty reset.
Kodi
Factory installed is Kodi 18.5 Leia. The installation folder reachable via adb shell terminal is /sdcard/Android/data/org.xbmc.kodi/files/.kodi/.
The main problem with Kodi Leia is that it ships with Python 2.7, whereas all the modern add-ons are written in Python 3.x, which is available only from Kodi 19 Matrix onward.
I tried to install some video add-ons, e.g. the YouTube add-on and the Rai Play add-on (Italian radio and television), but unfortunately they didn't work.
For the YouTube add I downloaded version 6.8.25, the last one that is available from the repository for Kodi 18.5 Leia. Then I copy-pasted the Google API keys into the userdata/addon_data/plugin.video.youtube/api_keys.json file and executed the two sing-in procedures using the codes to be inserted into google.com/device URL. But you can imagine that version 6.8.25 no longer works with the YouTube service.
Using the Rai Play add-on I got always the HTTP Error 404: Not Found error in temp/kodi.log. The add-on version installed from the repository is 3.5.1, On my other Kodi installations the version that is working is 4.1.2 instead (which requires Python 3.x).
Then I tried Kodi as a local files player only, both copying files on the internal memory /sdcard/Movies/ and accessing files via a SMB/CIFS share…
Upgrading Kodi to 21.2 Omega
The Kodi app installed from factory is customized by Tanix, the name is changed in TV Center and also the icon differs from the official one. Fortunately enough it is possible to uninstall it; just go to Settings ⇒ Apps and find TV Center and uninstall it.
It is not possible to just upgrade the app from the Google Play or F-Droid, because the app is custom and the signing key differs from the ones used by the Google or F-Droid packages.
I download the Kodi F-Droid version 21.2 (2102000) for the armeabi-v7a architecture, saved it into /sdcard/Download directory and installed it from the simple file manager app. I downloaded the apk file from the web site; I don't know why I was unable to install it directly from the Google Play or F-Droid app manager; both them did not offer me the option to install version 21 of Kodi.
NOTICE The Tanix TX5 has an ARMv8 Processor, so I first tried the package for the arm64-v8a architecture available on F-Droid, but the installer refused to install it. Instead, the package for armeabi-v7a did install correctly. This is because the operating system is indeed 32 bit.
With the new version of Kodi it was possibile to install the YouTube add-on and make the Google registration procedure (copying the API keys into the settings and registering the device on google.com/device). Also the Rai Play add-on is woring.
Screen saver and stand-by
I don't like any of the fancy screen savers with stunning images or psychedelic animations. I just want that the screen becomes black after some time and eventually the HDMI display goes off to save power.
Fortunately with the Tanix TX5 this is possible, even when the Kodi app is running. Just set the Android Google TV and Kodi accordingly:
- Android ⇒ Settings ⇒ System ⇒ Ambient mode ⇒ Screen saver ⇒ Turn screen off
- Kodi ⇒ Settings ⇒ Interface ⇒ Screensaver ⇒ Screensaver mode ⇒ None
When the device is in this power-saving mode, the Ethernet port is also turned off, making it impossible to connect to it remotely. The clock display is also off. The device can be woken up with the remote control.
Debate about TV boxes security and malware
There's a lot of debate online about TV boxes for sale on various online marketplaces. Any marketplace: those with a solid reputation like Amazon and those more chaotic like Aliexpress. Numerous reports from security experts have found malware on these devices. Often, the malicious software is so sophisticated that even an experienced user can have trouble determining whether a given device is reliable or a Trojan horse in the hands of unknown parties.
My personal experience is that a reputable marketplace like Amazon offers no real additional guarantee of product security.
I read tha some devices are sold heavily overpriced because they promise to allow access to several streaming platforms without actually subscribing the legitimate subscription plan. In that case the device often includes extra apps like VPN, custom streaming players and launchers which refers directly to the pirate organization providing the illegal service.
This is not the case of this Tanix TX5 that I received. At a first glance there are only legitimate apps like YouTube and Netflix, that requires your official subscription plan. Obviously the root permissions that I found enabled per default, allow to install whatever extra app you want.
I haven't performed any in-depth analysis to determine the security of the factory-installed software on my device. Upon initial inspection, I found no obvious malicious behavior, except for the nasty habit of all software vendors (primarily the omnipresent Google) of constantly calling their home services to presumably provide information on our activities and to possibly download and install software updates (though please note that the device was offered to me as a free trial).
Root access is enabled by default without a permission manager; therefore, there's no Magisk-like feature that asks for confirmation if an app requires root permissions. This is a bit concerning because any additional application you install will have the ability to take full control of the device.
This obviously doesn't exacerbate the problem with factory-installed apps produced by Oranth Technology or other parties. Even the Google apps you find factory-installed aren't those signed by the original developer, but rather packaged by the hardware vendor. Simply put: you should trust Oranth Technology like you should trust any other manufacturer when purchasing any Android device.
A final consideration: I apreciate the root permission enabled per default. Also the ability to enable developer options is highly appreciated. An expert user will be able to analyze all the sofware installed, eventually disinstalling or replacing it with others from a trusted source.
I will soon explore the possibilitỳ to install a total different firmware on the Tanix TX5. In the past I was very happy with CoreELEC or LibreELEC, which have a consolidated good reputation of reliable Open Source projects, but it seems that support for the Amlogic S905Y5 is still missing. A new opportunity seems to be offered by slimBOXtv, whose Russian-language nature, however, somewhat undermines its reputation for openness to the community.
Tanix Calling Home
On the device there is process named com.oranth.deviceinforeport which tries constantly to call (home?) the IP address 192.168.199.215 on port 8089. Port 8089 is knwon to be used by the Splunk server (which main purpose is to collect and analyzes high volumes of machine-generated data). Neverthless address 192.168.199.215 belongs to a Iana reserved private block and it should not route on the internet.
It seems that the address 192.168.199.215 is hard-coded into the software, because no DNS query is performed by the device that resolves to that address.
Sniffing DNS queries executed by the device you can find a plethora of requests for names under the Google's googleapis.com and gstatic.com domains, several PTR requests in the net range 208.67.216.0 - 208.67.223.255 (Cisco OpenDNS), plus several requests for addresses in the following domains:
| app-measurement.com | US - Google LLC |
|---|---|
| boxstv.com | US? |
| longott.com | CN |
| oranthservice.com | CN |
| tentvs.com | HONG KONG (launcher app?) |
| tvsetting.com | ? |
For my taste it is a lot of activity for a device which is doing nothing. It may seem surprising, but requests to Google domains are more intrusive and limiting than those to Chinese domains; in fact, if you block traffic to googleapis.com, the home app becomes practically unusable and consequently the entire TV box. By blocking the other DNS requests, however, you can still use the device.
Blocking only DNS queries does not guarantee that any nasty apps running on the device cannot call home, upload your data, download software, install it without the user ever noticing it. You must trust the producer of all the sofwares installed on the box, which are many!
Recovery Mode via toothpick method
- Unplug the power from the device.
- Connect a screen to the HDMI socket.
- Connect an USB keyboard and/or an USB mouse (mouse required for some recovery, e.g. TWRP).
- (Optional) insert the SD card with the
recovery.imgon its root directory (FAT32 format). - Insert a toothpick into the A/V hole, and push it untill you feel the click of a microswitch.
- Keeping the toothpick pressed, insert the power plug.
- Wait until you see the recovery screen (about 15 seconds).
Tanix TX5 host on the USB bus and toothpick
The Tanix TX5 can be turned on powering it on the USB port using a male to male USB cable, e.g. you can turn it on connecting it to an USB port on your PC.
If you use the USB port near the TF card reader (only this port works!), the device presents an USB host on the bus; using the lsusb command on GNU/Linux you can see the following:
Bus 001 Device 043: ID 1b8e:c004 Amlogic, Inc. DNL
The device does not actually bootstrap, it shows the Tanix logo on the display and stays there. It seems that it is actually in the fastboot mode; using the fastboot command on GNU/Linux you can see it:
fastboot devices
005c9700d0cf2d2c00000000         Amlogic DNL
You can issue the fastboot reboot command: the device actually reboots disabling the Amlogic DNL USB host and starting the normal operating system.
If you power-up the Tanix TX5 via the USB port while holding down the hidden switch into the AV connector, something happens to the USB bus; three scenarios can occur:
- No host is presented at all
- The same Amlogic, Inc. DNL host is shown as seen before.
- A different host named Google Inc. Celkon A88 appears.
The three scenarios appear in an ordered rotation, so you just have to repeat the power on with toothpick several times to get the desired one.
These are the Google USB host details:
Bus 001 Device 083: ID 18d1:0d02 Google Inc. Celkon A88
Also when booted in this host mode the Tanix logo is shown and the device is acknowledged as a fastboot device:
fastboot devices
qurra5c97d0cf2d2c        fastboot
slimBOXtv
At the moment (February 2026) there are not official releases of CoreELEC nor LibreELEC for this hardware. Instead there is the slimBOXtv project which released a specific version.
This is a summary of what I experienced with this software:
- Burning the slimBOXtv image into the flash.
- Configuring the Google TV app (Google account, Assistant, etc.).
- Pairing the Bluetooth remote.
- Check the Developer Options (already enabled).
- Checking the Magisk app.
- Install F-Droid from USB storage, using File Manager (foreign install already enabled).
The slimBOXtv image for the Tanix TX5 is downloadable from the dedicated slimBOXtv page. To flash the image into the device almost all the instructions available on the net refer to a Windows software named Amlogic USB Burning Tool. It seems that a well-known site providing instructions and download links is Troypoint.
We must spend some words about the slimBOXtv project and the other info sources and tools. slimBOXtv defines itself as a popular custom (alternative) firmware for TV set-top boxes based on Amlogic processors. Unfortunately the project is not open source, you can download only binaries in two variants: ATV (Android TV-like) or PIE (classic Android interface). The home site does not have a consolidated international community, it is mainly Russia-oriented. Neverthless the sofware is well-known in communities like Reddit, XDA and 4PDA. At the moment it seems that there are not confirmed malware incidents in the slimBOXtv firmware itself.
The sofware required to burn a firmware image into the Amlogic device is Amlogic USB Burning Tool. It is a Windows-only software probably produced by Amlogic, Inc, but which does not have an official download page. Probably the software is distributed through OEM partners and device manufacturers. You can find copies in community repositories, and you are forced to trust them.
I used version 3.2.0 of the software, downloaded from the Troypoint page. Here it is the checksum of the archive:
10f5788725edda67e604a8f1ea22f697 Amlogic_USB_Burning_Tool_v3.2.0.zip
The flashing operation goes as follow:
- Install the Amlogic USB_Burning Tool software on a Windows machine.
- Download and unzip the firmware image .
- Launch the software and choose the English language from the menu; restart the software.
- Open the firmware image file (the name of the loaded file appears at the bottom of the window).
- Uncheck the Erase bootloader option.
- Click the Start button.
- On the Tanix device press the hidden button into the 3.5 mm AUX audio socket with a toothpick.
- Keeping the hidden button pressed, connect the USB cable from the Windows PC to the USB port. You must use the USB port near the TF card reader, the only one that works for this.
- The software should make a sound and display the progress bar of the burning operation. Keep the toothpick pressed for a few more seconds.
- If the flashing operation does not start, disconnect the USB cable and try to connect it again.
Below there is the screenshot of Amlogic USB Burning Tool after a successful burning operation:

Like the original operating system, the adb is not available on any of the USB port. Also like the original operating system, slimBOXtv runs over Android compiled for the armeabi-v7a architecture.
Installing packages from F-Droid caused some issues: e.g. install from untrusted sources was disabled for F-Droid, installing Termux was discouraged by Google Play Protect, etc. Finally I was unable to install Kodi from F-Droid at all, the package is installed from the repository but failed to install repeatedly, remaining into an apparent infinite loopp. I resorted on downloading the apk from the PC (choosing the armeabi-v7a architecture) and installing from an USB storage via the file manager.
Usefull apps
| Via | Internet browser, available also on the Play Store. |
|---|---|
| X-Plore | Dual panel file manager. It contains also an FTP server that can be automatically enabled when the WiFi connection become active. |
Removed apps
From the default installation, I removed several apps because they are mainly or exclusively in Russian language or Russia media oriented:
| Easy Installer | Uutility to simplify installing APK packages and add-ons from local storage or URL. |
|---|---|
| VK Video | A video-streaming platform created by the Russian company VK. It works similarly to YouTube: users can watch, upload, and share videos. |
| Lite HD TV | |
| SmartTube | |
| RuStore | It allows users to download, install, and update Android apps and games, similar to Google Play. |
| RUTUBE | |
| YoWindow | Weather and wallpaper app. Available also on the Google Play. |
| TorrServe | A program that streams video directly from torrent files or magnet links without downloading the entire file first. It is available also on F-Droid. |
| FMPLAY | Internet radio player. Comes preloaded with many Russian stations; I was not able to custimize the stations list. |
| Aptoide TV | Alternative app store designed specifically for Android TV boxes. It offers apps optimized for larger screens, allowing users to bypass regional restrictions or download apps not available on the official Google Play Store. |
Problems installing from F-Droid
Sometimes installing apps from the F-Droid repository does not work; the package is downloaded but the install procedure does not terminate. I In these cases I resorted to downloading the apk file from the F-Droid website and then installing it from the file manager.
Web References
- Producer official page
- Reviews
- Android TV Boxes infectred by Malware
- Alternative firmwares
- Other tools
- VIM1 Install OS into eMMC via USB Flash Tool - Alternative GNU/Linux burn tool for Amlogic devices?