This is an old revision of the document!
Table of Contents
Olympus E-M10 Mark II failures
M.Zuiko Digital ED 12-42 Pancake Lens
In September 2024, after near five years of use (the counters were showing about 4300 switch-on and 12600 total shots) the M.Zuiko 12-42 mm pancake lens failed. When you turn on the camera the lens moves, but it is not aknowledged by the camera and the LCD monitor remains black.
I purchased a second-hand replacement (same brand and model) which was in a excellent condition, almost like new. The number of switch-on of this second-hand lens were unknown. Unfortunately also this lens after one year and about 450 more switch-on, failed like the first one.
LCD Monitor cable
In May 2024, five and a half years after the purchase (the counters were supposedly 4500 switch-on and 14000 shots), the LCD monitor cable broke. Initially, the monitor would shut off when I rotated it from its resting position, but then the failure began to occur more and more frequently until the monitor was permanently off.
I purchased a replacement cable from a Chinese seller on the Aliexpress online store, the cost was just 5 € shipping included. Disassembling the monitor and replacing the cable is a job of medium difficulty, you can find some howto videos online. The result was very satisfactory. The careful disassembly did not damage the various components, and after reassembly, the camera was undamaged and fixed.
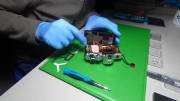
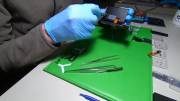
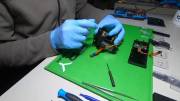
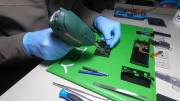
Here below some still images from the video Sostituzione flex cable Olympus OMD EM 10mkIl parte prima e parte seconda, where the cable is replaced (requires some soldering too):
Shutter actuations hidden menu
- Turn the camera ON while holding down the MENU button;
- Once the LCD screen lights up, release the MENU button and then press it again briefly;
- Use the arrow pad to move DOWN to the SPANNER item in the menu and press RIGHT;
- Use the arrow pad to move DOWN to the BRIGHTNESS item in the menu and press RIGHT;
- Press INFO;
- Press OK, and a screen showing the camera designation will come up;
- Press arrow pad UP;
- Press arrow pad DOWN;
- Press arrow pad LEFT;
- Press arrow pad RIGHT;
- Press the SHUTTER RELEASE button;
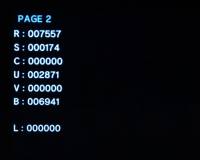
- Press arrow pad UP (a PAGE 1 with some abbreviations and numbers appears);
- Press arrow pad RIGHT to move to PAGE 2;
- Write down the number to the right of “R” of “MS” on PAGE 2. This is the number of shutter releases (the number to the right of “S” is the number of times the flash has fired);
- Switch the camera Off to revert back to normal operating mode. Congratulations, you have successfully retrieved the shutter count information!
| Hidden menu codes | |
|---|---|
| Letter | Interpretation |
| R or MS | Total shot count |
| S | Total shots with flash |
| C | (unknown) |
| U | Switch On count |
| V | (unknown) |
| B | Total shots with IBIS |
| L | (unknown) |

